


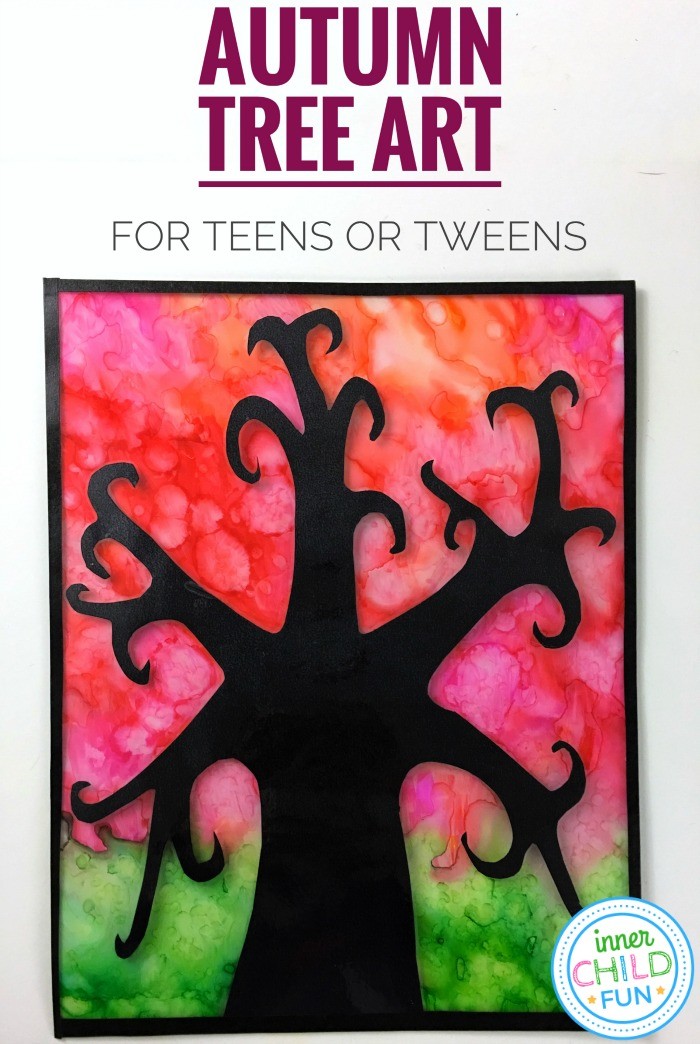
Here is a beautiful Fall art project for teens or tweens to create stunning Autumn trees! This would be a great art project to try on a rainy day, or anytime you need a bit of colorful fun. There are several variations to explore. Why not make a smaller version of this project to create unique bookmarks to give to family or friends?
To make this Fall art project for teens or tweens, you will need:
- alcohol-based permanent markers
- laminating sheets
- laminator – We love this model and have used it for several years!
- black card stock paper
- white card stock paper
- scissors (or kraft knife & cutting mat)
- rubbing alcohol
- eye dropper
- cotton swabs
- black masking tape
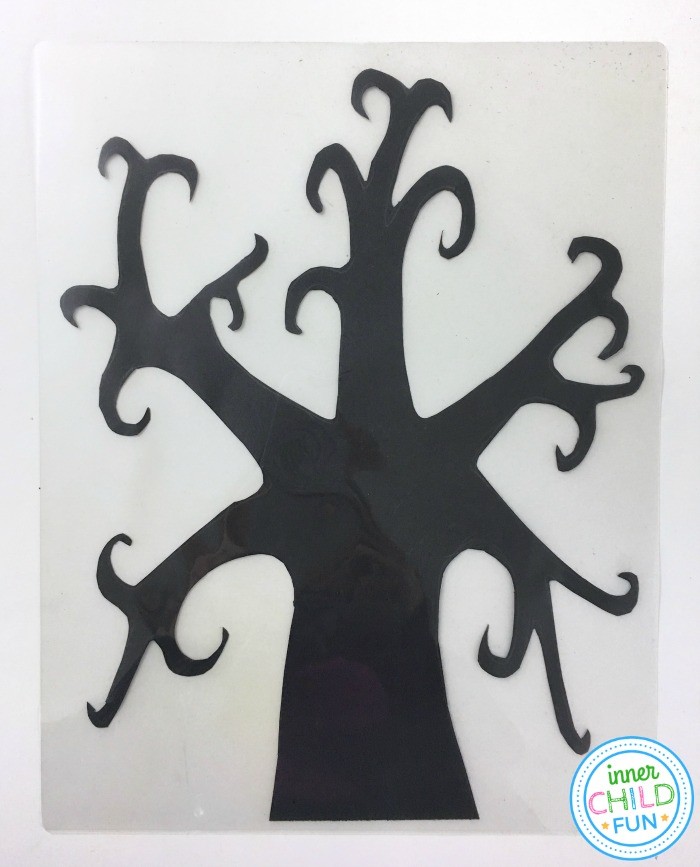
Step 1 – Add the tree trunk
To begin, use a pencil to trace the tree trunk onto a sheet of black card stock paper. Your design can be as simple or complicated as you would like! For simpler designs, use scissors to cut out the trunk. For more complex trees, carefully use a kraft knife and cutting mat to cut out your design. Next, slip the tree trunk into a laminating sheet and laminate according to the laminator’s instructions.
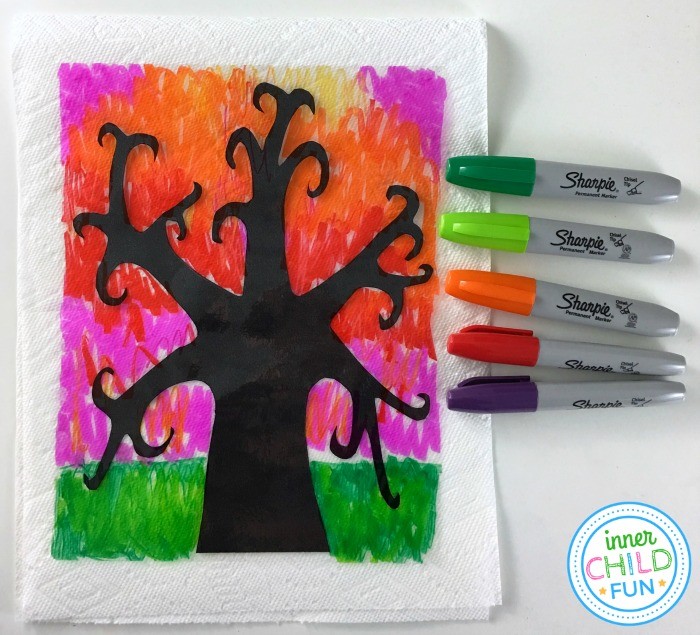
Step 2 – Color the background
Use alcohol-based permanent markers to color the background of the tree picture. Don’t worry if there are some white spaces since they will be filled in later. For this example, we used reds, purples, and oranges for the tree leaves, and different shades of green for grass.
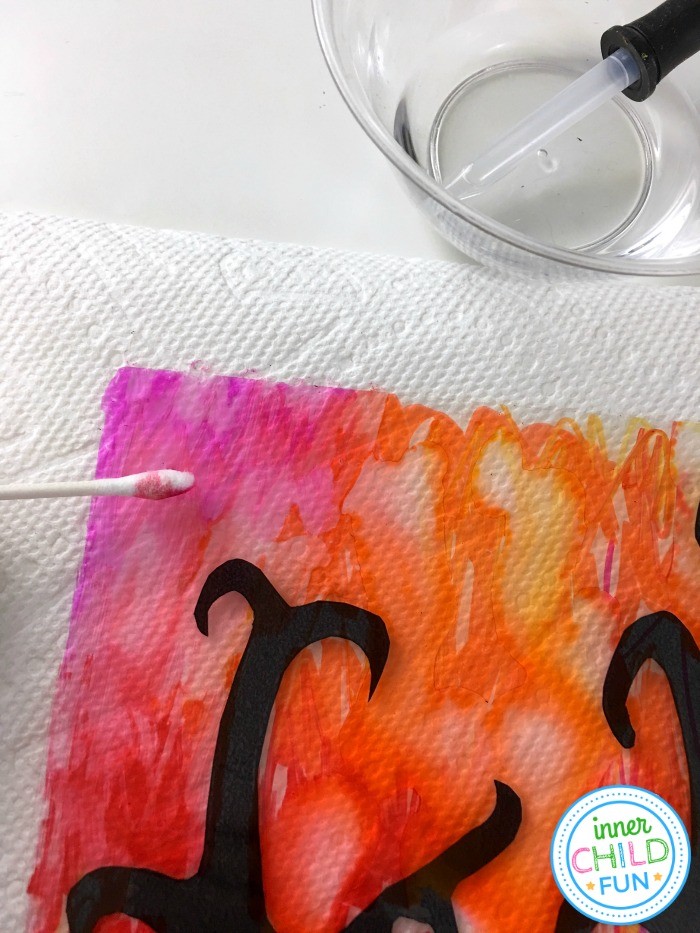
Step 3 – Blend the ink
Once the background is colored, it is time to blend the ink! Dip a cotton swab in a tiny bit of rubbing alcohol, and gently blend the colors. If you happen to remove too much ink, simply wait for the rubbing alcohol to dry, then color again with the permanent markers.
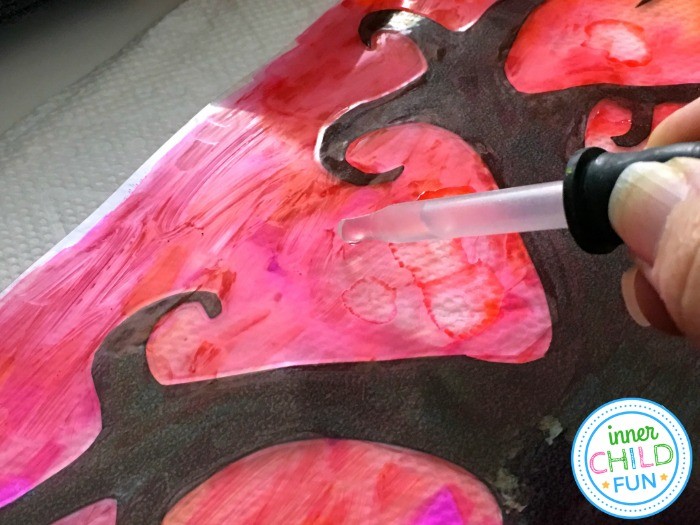
Step 4 – Add texture
Once the inks are blended, use an eye dropper to add tiny droplets of rubbing alcohol onto the ink. The ink will disperse like magic! Allow the rubbing alcohol to dry completely.
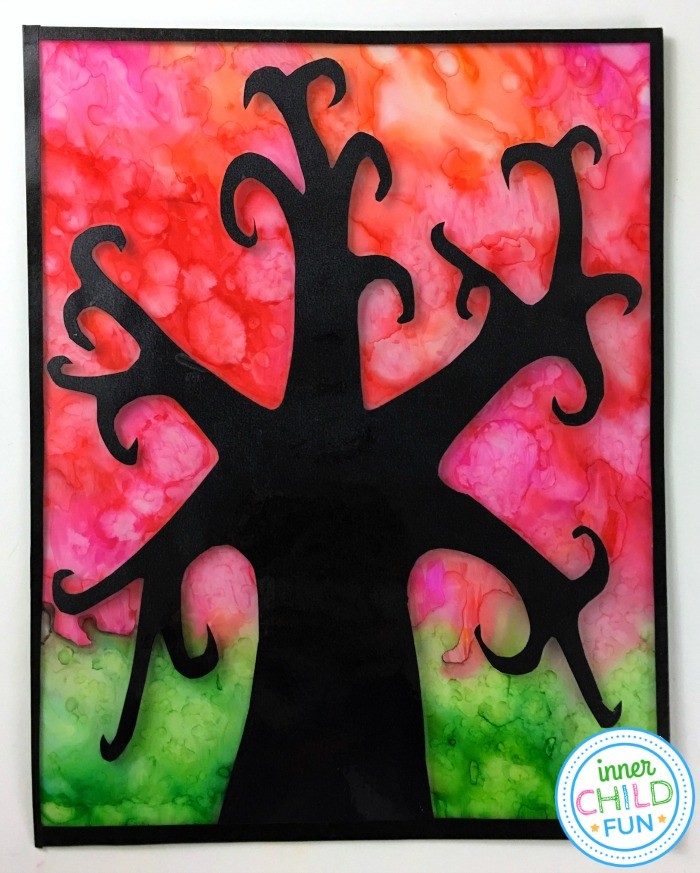
Step 5 – Frame and display
For a simple frame, add a sheet of white cardstock behind the laminated sheet. Use black masking tape around the edges of the white cardstock and laminated sheet to hold your artwork in place.
Be sure to display your artwork proudly in your home!
Have fun!!


This is gorgeous! I hope it will work with contact paper, because we don’t have a laminator.
Please let us know if you try it, Tera! I have had good luck substituting contact paper for other projects, but did not try it for this particular one. Have fun! 🙂