It is very rare that we feature a project here on Inner Child Fun that requires a trip to the art store, however this is the MOST requested project Emily has asked to do during Clara’s nap time. Suminagashi has kept Emily happily creating beautiful prints for hours!! Here are some tips for trying Suminagashi for kids.
Suminagashi is an ancient Japanese technique for decorating paper with inks. You can learn more about this technique here. We first discovered Suminagashi last Summer during a trip to the art store, and now almost a full year later it has been repeated many many times with much success! To begin, you will need a box of marbling paints — we love the Suminagashi Marbling Kit
….
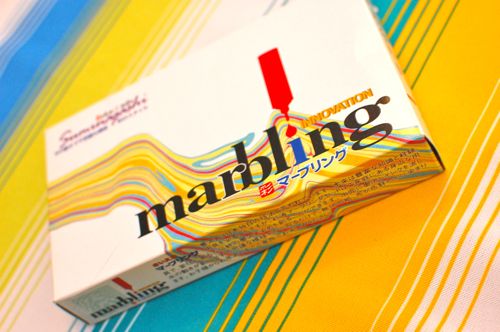 I used a 40% off coupon and found it at Blick Art. You can also purchase them online here
 (around $15). They are recommended for ages 6 and up. Emily was six when she started to use them, and that was probably a good age to start. Considering how much Emily uses these, and that a few drops of ink goes a loooooong way, it was definitely money well-spent! They are non-toxic & do not give off any fumes, but they will stain so wear an apron.
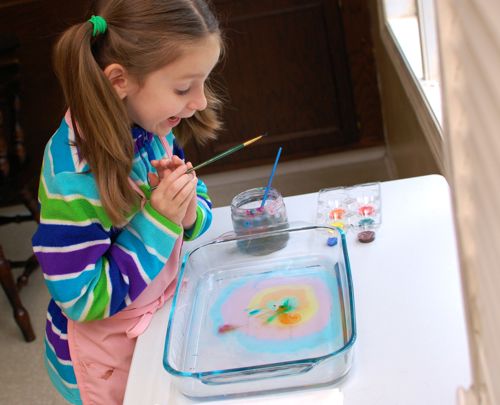
Next, you will need a dishpan filled with plain ol’ water about 2 inches deep, a few paint brushes and either a plastic or styrofoam egg carton to hold a few drops of the ink used to load up the brushes.
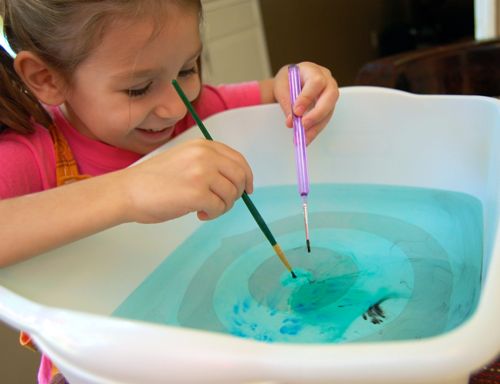
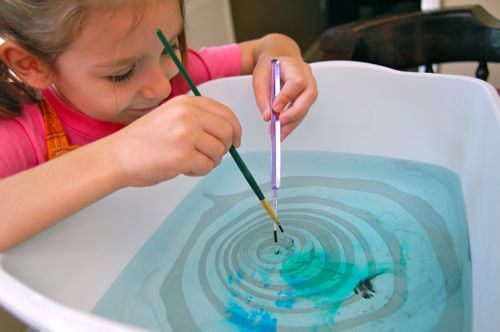
Emily used two brushes for each print. Load up your brushes and carefully tap the surface of the water with ink. It will instantly spread like magic!! Emily loved making concentric circles by alternating with each brush in the middle of the inner most circle. These photos were from last August…
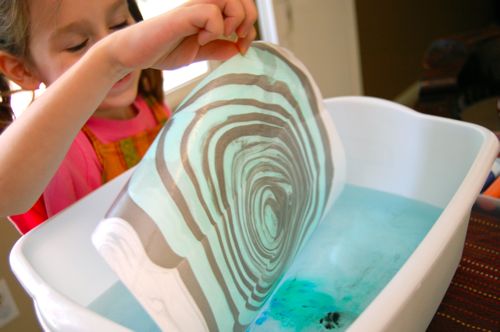
She can be completely mesmerized by this!! Continue with your pattern, and when you’re ready, place a sheet of cardstock or paper on top….
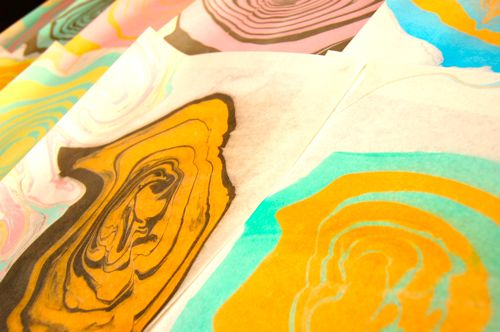
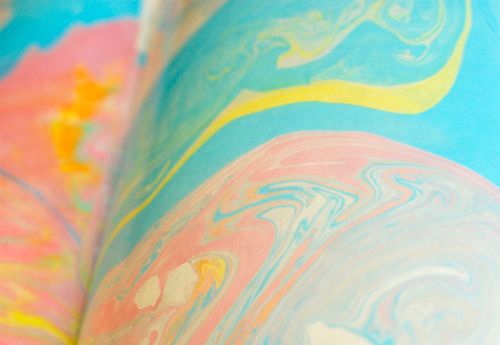
Lift it up to reveal your beautiful (and very unique) design!
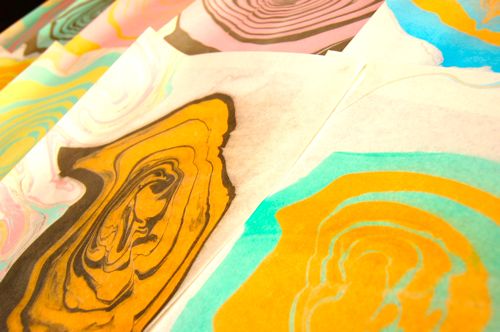
Experiment further by blowing gently on the surface of the water either directly, or with a straw. Maybe use the opposite end of the paintbrush to swirl the ink around…. So pretty!! ALL of these were made by Emily in one afternoon…..
And this was the scene in our kitchen today…. It just never gets old, right??
I made a short video demonstrating the process:
Ooooooooooo……
Have fun!!
*This post contains affiliate links.
Free Printable
Please sign up for our weekly-ish newsletter (it’s free!) and after signing up, you’ll be sent a link to a free printable list of 100 Rainy Day Activities for Kids — exclusively for our lovely newsletter subscribers! To sign up, click here.




Dear Valerie,
Gesundheit!
Love,
Mark
so beautiful! I will need a while before trying with my girls – but I will definitely try it down the road – I can see my oldest especially really enjoying this. She loves designs and painting.
Bernadette – Mom to 2 Posh Lil Divas
This is wonderful Valerie! I will definitely have to order my own kit. I would love to find the perfect ingredients from home to do some marbling with preschoolers too!
wow- I’ve never seen anything like this! I think I would be mesmerized as well!
Wow those are beautiful! I will have to try this when Sammy gets a little older!!
Ah! I remember doing this in grade school and I had completely forgotten about it! We used our pretty paper to make homemade hard back covers for stories we had written. (I hope my mom saved that book somewhere!) These also make pretty homemade wrapping paper for small items.
Thanks for reminding me of its existance! Maybe I will do my own while I wait for the girls to grow a little older. ha ha.
This looks like a great additon to my planned summer activities. Thanks!
VERY cool! I bet Emma would enjoy this.
Oooooooooooooooooooooooooh! So pretty! I’ll have to try this.
I love how these turned out! My girls love marbling paper as well. This week we tried marbling with nail polish. The girls LOVED it.
Wow! They are just beautiful!
Becca
I have to bookmark it for later – it looks very lovely!
So not waiting for my son to be 6, so just getting it for me. Love it!
I do a similar type of art with my little kids using shaving cream and drops of tempra paint and swirling it around. I just lay the paper over the swirl and the wipe the shaving cream off. The little ones love it. I’ll have to try this stuff when my kids are older though for a different medium to work with.
Valerie, This makes me sooo happy. I so hope you checked out the paper Marbaling my kids and I were able to go and see. It was so much fun. Truly my girls and myself loved watching the picture transform from water to paper. Here is thelink:
http://bloggingthemoments.blogspot.com/2011/03/simply-beautiful-ebru.html
In Turksih marbaling is called EBRU. I hope you enjoy it. I love your post on paper marbaling!!
~becky
Awesome! We definitely need to try this one day! Very cool!
I never heard of this before! My 8.5 year old daughter is an artist, and we are alwsy in the craft store with her gift cards and my coupons looking for something new to try. This will be on our to do list for summer vacation!
We’ve done a version of this using enamel paints (like the ones you use for model cars) to make Christmas Cards. It was extremely messy and didn’t turn out quite as nicely as yours, but it did work. I think I’ll be looking into a kit like this one the next time!
I MUST try this! I’ve never heard of this!
Valerie- I am sitting here planning activities for our library’s summer reading program to go with a Japan theme… looking for more than origami… and here you are! Thank you so much for the information about this great craft. How many children do you suppose could be accommodated with this one set of inks if they each make 2 or three sheets?
Hi Kate,
I am SO happy to hear that!
To give you an idea, each time Emily has made these prints I put a few drops (6-7 drops) of the ink in a plastic or styrofoam egg carton. She makes close to 20 prints each time and still has some ink leftover — she almost always runs out of paper first. We’ve used this same set for almost a year and we haven’t even used 1/4 of each ink color yet!
Hope this helps! Have fun!! 🙂
Oh, this is something I did at school!!!! One of my childhood favourites! I have been thinking of trying it again but wasn`t sure what inks I should use.
Now I know 😉
Hi Valerie. I live in Turkey. Masters of this art has done very well here. But I never thought would be fun for children. As soon as my son also perform in marbling.Thank you for sharing…
Hi,
Are the inks special inks or just regular marbling inks?
I can’t find them in the uk
I love marbling paper! We did this project using liquid starch! It is so much fun- thanks for sharing it with us on The Sunday Showcase!
Aimee @ Classified: Mom
I love your blog, thank you for sharing your fantastic ideas. Greetings from my creative activities blog.
Valerie,
Did you use the float paper disks that are included in the kit? I’ve also heard of using surfactant, but it doesn’t look like either are being used in the pictures and it still comes out beautifully!
I’ve purchased this for my daughter’s 8th birthday and we are excited to try it!
Maria
love this… thanks for sharing! I’m going to Pin it.
What kind of paper do you use for this? I’m thinking regular printer paper would not hold up.
I LOVE this idea and my 9 and 7 year olds will too. I am thinking about it in my classroom as well!! (2nd grade)
My art teacher friend would love this, for the cards she handmakes and to do with her classes. I’ll pass along. Thanks!
I rarely find something I haven’t seen before. This is something new for me. I’m excited to try it with my girls. Very cool
have u triedd this with fabric? like one of her vt-shirts?
I really like this idea, have you tried the milk, food coloring, dish soap on a toothpick trick? It looks similar but you don’t have a print to take with you…
Oooo… I’ve seen that, and it is on my must-try list! Looks really neat. Thanks for sharing!!
Love this! Thank you so much
Looks so cool! Where did you purchase the marbeling paint??
Valerie,
These are amazing! I’m at a loss for craft ideas these days and this will suit my 13, 11 and 6 yo!!
This is so cool! Thanks for the inspiration!