

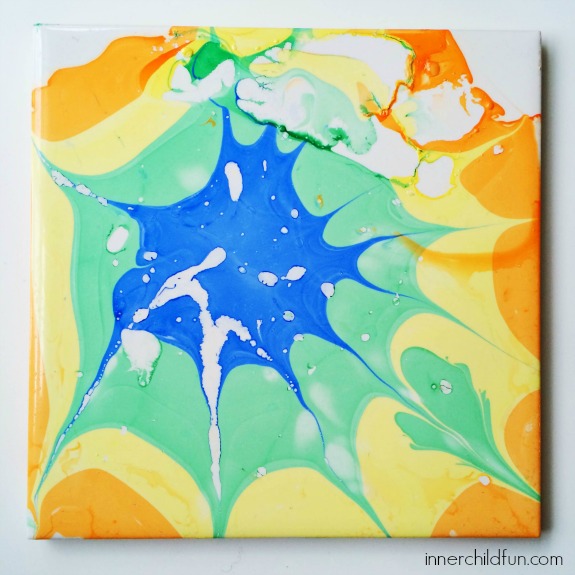
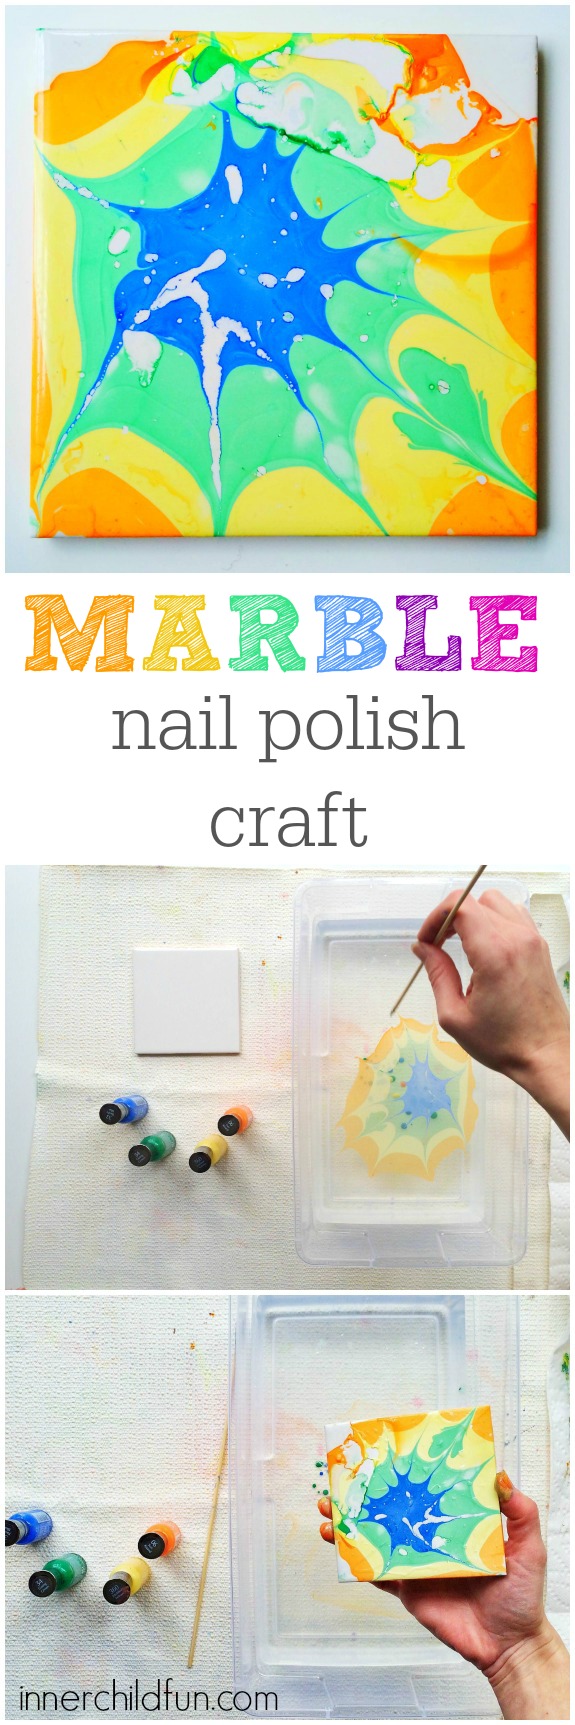
This marble nail polish craft would be a fun weekend project for older kids. These painted tile coasters would be lovely handmade gifts for Mother’s or Father’s Day. I love how each tile is unique! This marble nail polish craft is a great way to use up the last bits of leftover nail polishes you may have that are otherwise taking up space in your home. Here is a simple marble nail polish video tutorial to get you started with this fun technique!
To make your own marble nail polish crafts, you will need:
- a surface to paint (in this case I used plain bathroom tiles to make coasters) Other ideas include: the bottom outside of a plain ceramic mug, plain cell phone cases, the outside of a plain glass vase.
- nail polish in various colors
- a disposable container large enough to dip your painting surface
- paper towels
- disposable gloves
- bamboo skewer
- sealer
Fill the disposable container with warm water. Wear disposable gloves. In a well-ventilated area, carefully pour the nail polish to float on the surface. You can also use the brush from the nail polish and gently touch it to the water.
Use a bamboo skewer to swirl your design as desired.
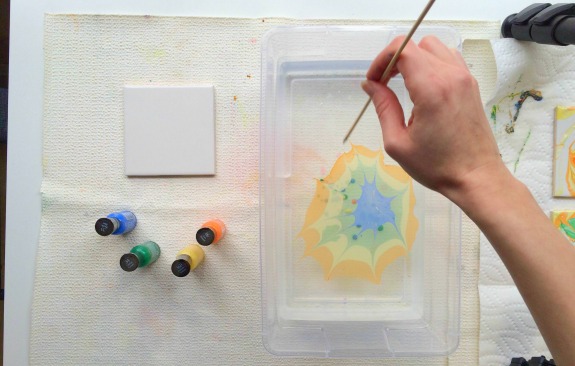
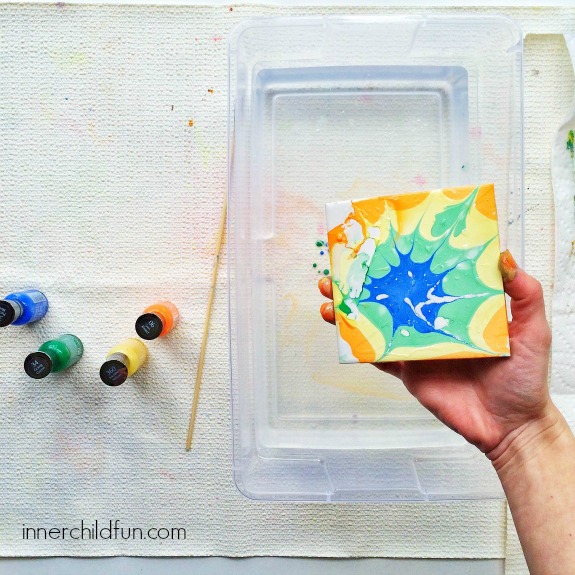
Dip your painting surface into the paint and your design will transfer over. Lay it on a paper towel and allow the paint to dry completely.
Once the surface is completely dry, you may add the sealant to protect your design.
Here is a quick marble nail polish video tutorial:
More Marble Paint Techniques:
- Liquid Laundry Starch and Acrylic Paint
- Shaving Cream Marble Paint
- Suminagashi Paper Marbling with Kids
Disclosure — This post contains affiliate links. Thank you for supporting us!


Valerie, it’s so much fun to have the opportunity to get to know you here! Love this idea. The vibrancy of finger nail polish makes such a finished looking piece! I can see the fun you’ve had.
Thanks so much for stopping by, Gina! Very appreciated! 🙂
You are doing the technique wrong. Go and watch the hundreds of youtube videos on watermarbling nails. You’ll see what you are doing wrong and why you end up with bubbles and uneven coverage. Try it the correct way.
There are many ways to do this technique. I agree that marbling on fingernails is a bit different. For larger surfaces, I like the unpredictability of this as the bubbles add to the charm of the piece. 😉
Rude!
There’s more than one way to kill a cat, as the saying goes.
I think this looks great and will be giving it a go ?