


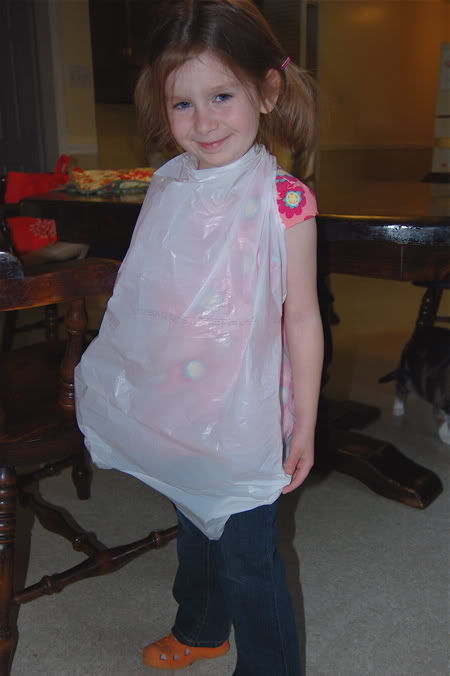
 Want to do a messy art project, and looking for a super-fast, inexpensive smock? You can make one easily from a garbage bag! This works very well for painting projects with a group of children.
Here’s how to make your own smock:
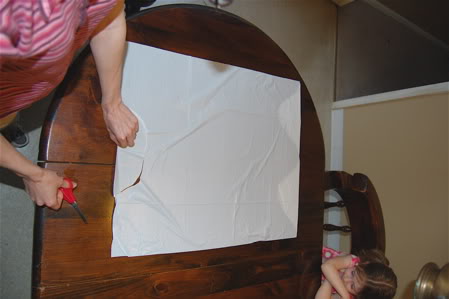
Lay garbage bag on a flat surface, and cut a large hole for your child’s head from the bottom of the bag.
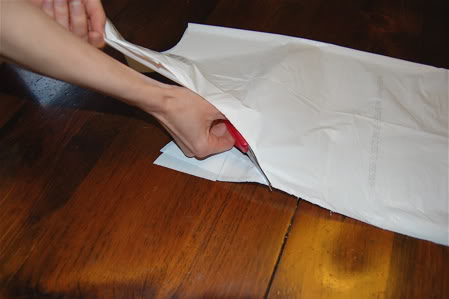
Next, fold the bag in half and cut arm holes along the sides, as shown.
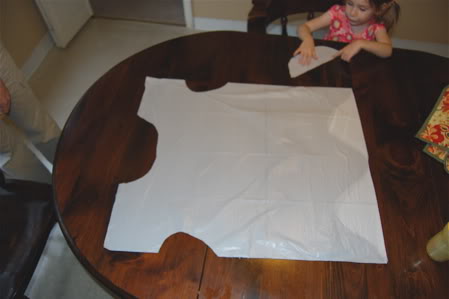
Your smock should now look like this.
Help your child get into it…
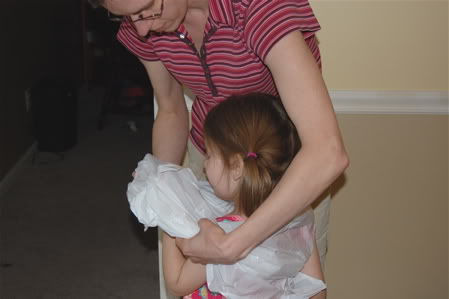
Here’s the trick to a good fit. Gather the shoulders, and tie a knot in back of your child.
I’ve found these work well for protecting clothes, and we have re-used our smocks many times.
Mark, if you are wondering where your large collection of old, ratty, hole-y t-shirts ended up…. we didn’t use them for smocks, or anything. Umm… Noooooooo… not us!


A very useful tutorial! Thanks 🙂
You’re welcome! Now you’ll be prepared for all your messy art projects! 🙂
Another super idea.
I’ve actually done this one before! But I didn’t know to tie it in back to make it fit better… that would definitely make all the difference! I will certainly try this. Little Bear and Pufferfish are INFAMOUS for getting paint all over their clothes… so much that I usually have them paint nekked!
Thanks, jennwa!
Little Bear, I know you are not alone in the nekked painting strategy. LOL I found just by tying a knot in the back made the fit much better, and the kids were more comfortable in them. Thanks for stopping by!
very nice and easy! Love the easy clean up 🙂 Thanks for linkng to Kid Friendly Friday. I love your header. SO cute!
Sarah, you are very welcome, and thank you so much for hosting Kid Friendly Friday. I think that is a fabulous idea and I love seeing what all the other bloggers come up with!
We use old uniforms from retail work way-back-when!